This article explains why roof leaks return after a repair in Austin and what a thorough diagnostic inspection should document before any fix is attempted.
Why a Roof Leak Comes Back After It Was Already Repaired
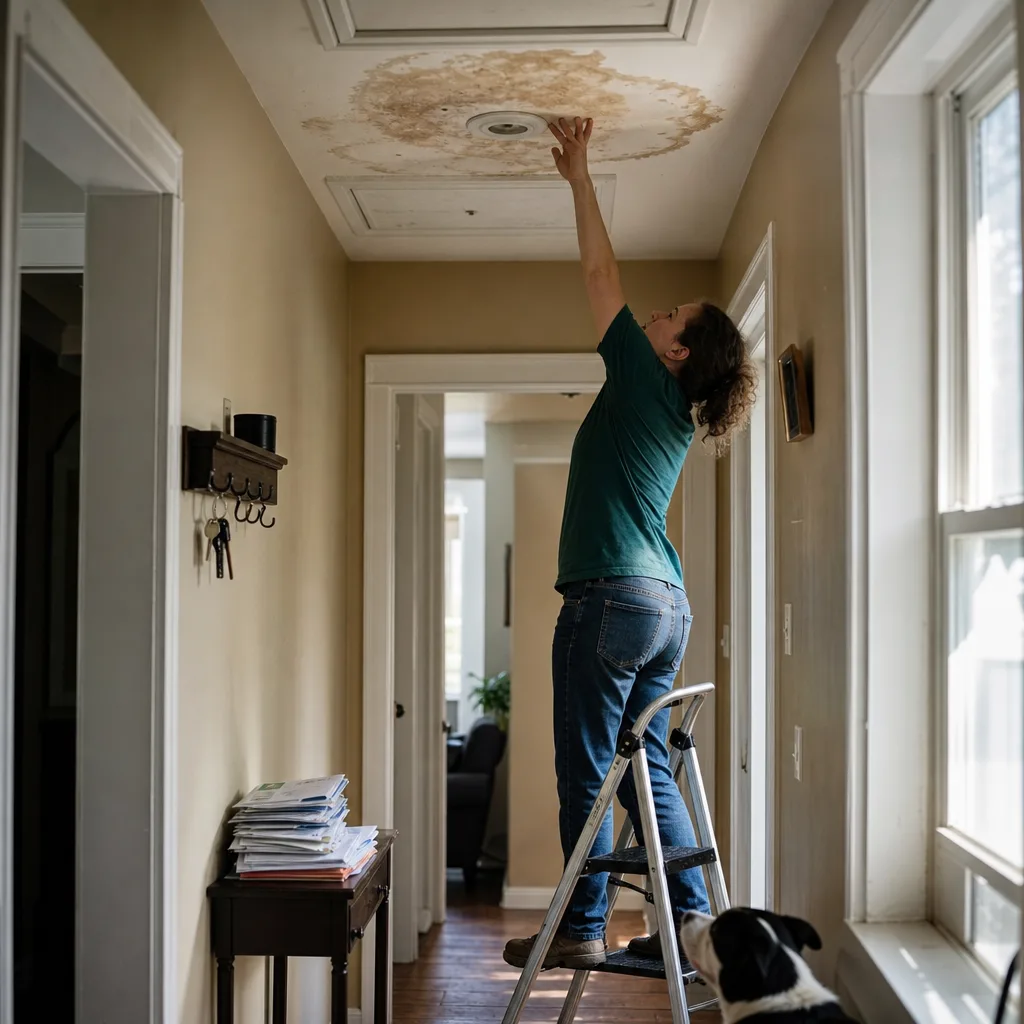
And then, after you hire someone and pay them to fix it, the ceiling dries out only to grow the stain again the next time it rains heavily. We totally understand the frustration. More homeowners deal with this issue than you’d expect.
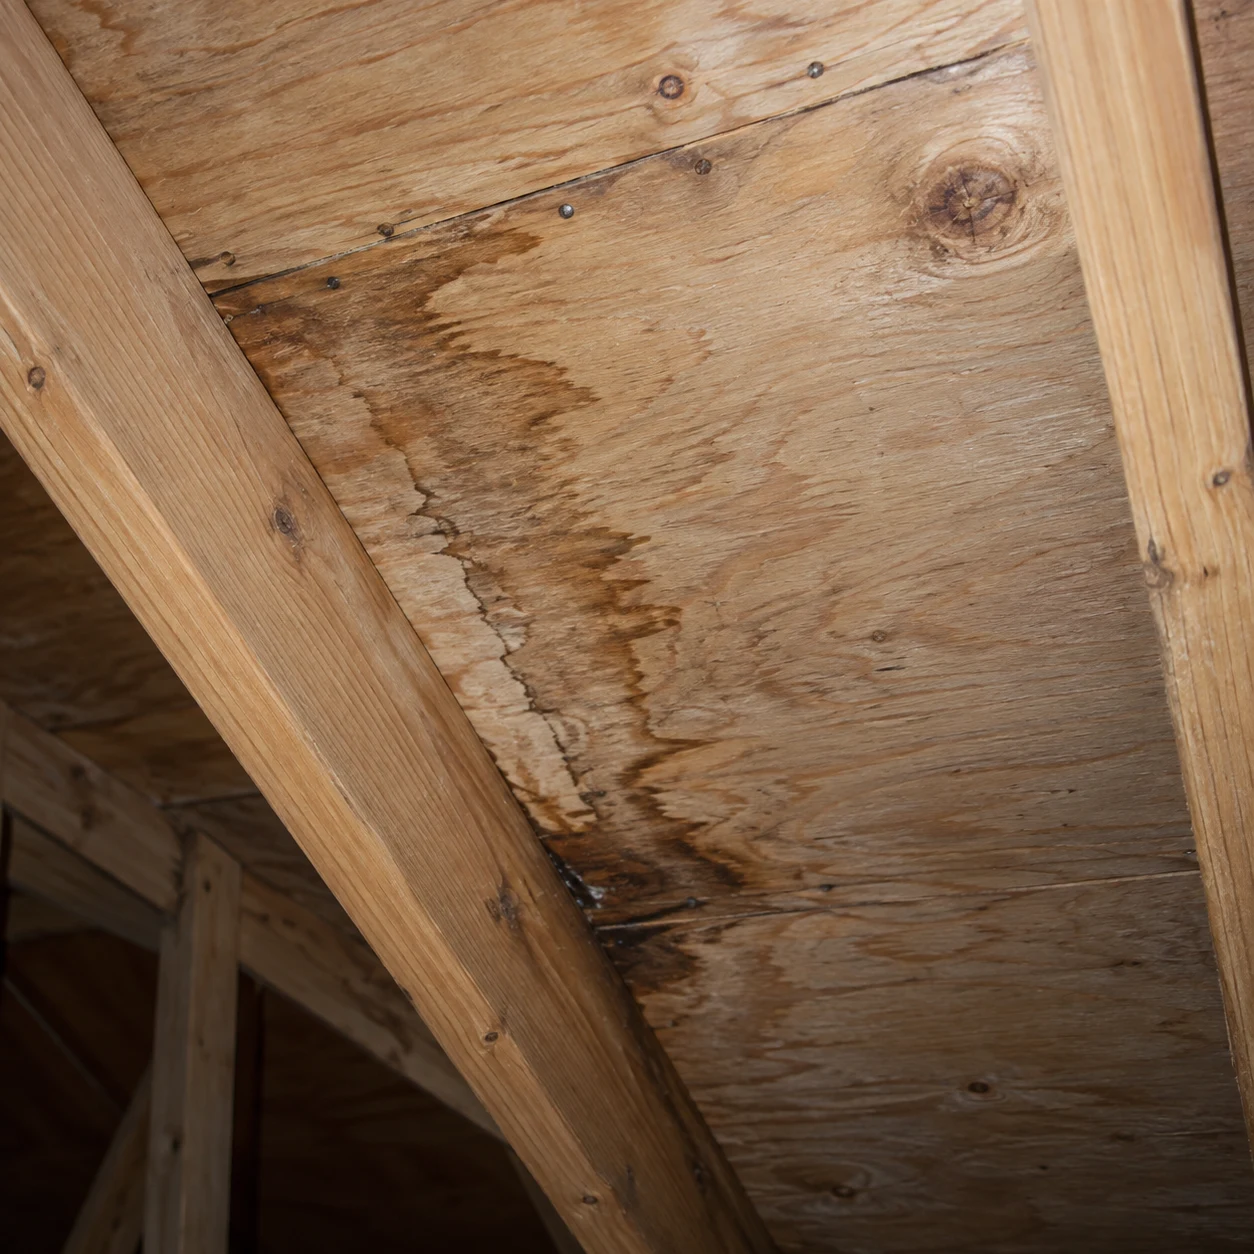
One of the biggest misconceptions we see is the idea that water penetrates the roof directly above the point of leak. Contrary to popular belief, water hits the roof, makes it’s way under the shingles or around a flashing joint and travels along the roof decking or rafters to the lowest point where it will pool before dripping through the drywall. The hole in the roof can be six or eight feet away from the stain on the ceiling. Many times this leads people astray when they are trying to find the source of the leak.
Putting a patch over the area with the stain will do nothing since the hole is still wide open.
Nails on the decking work their way up slightly as it moves during the hot summer months. The caulk/sealant protecting them dries out and cracks. Pipe boot rubbers crack. In all, as our wild weather continues to pound roofs with UV, sporadic hail, and surprise downpours, numerous points on a worn-out roofing system begin to give way one after the other. The leak gets repaired, but about a month later there’s another. It seems to the homeowner that the leak came back, but in reality, a whole host of new leaks were created by Austin’s brutal weather. It’s not for lack of trying. Most of the time, when repairs don’t repair, it’s not for lack of quality. It’s for lack of quantity.
These are the causes we find most often behind a repeat leak:
- This is all downhill from the actual bug because the entry point was incorrectly identified.
- Pipe boots cracked/split and/or dried out sealant at penetrations, and the penetration was never checked.
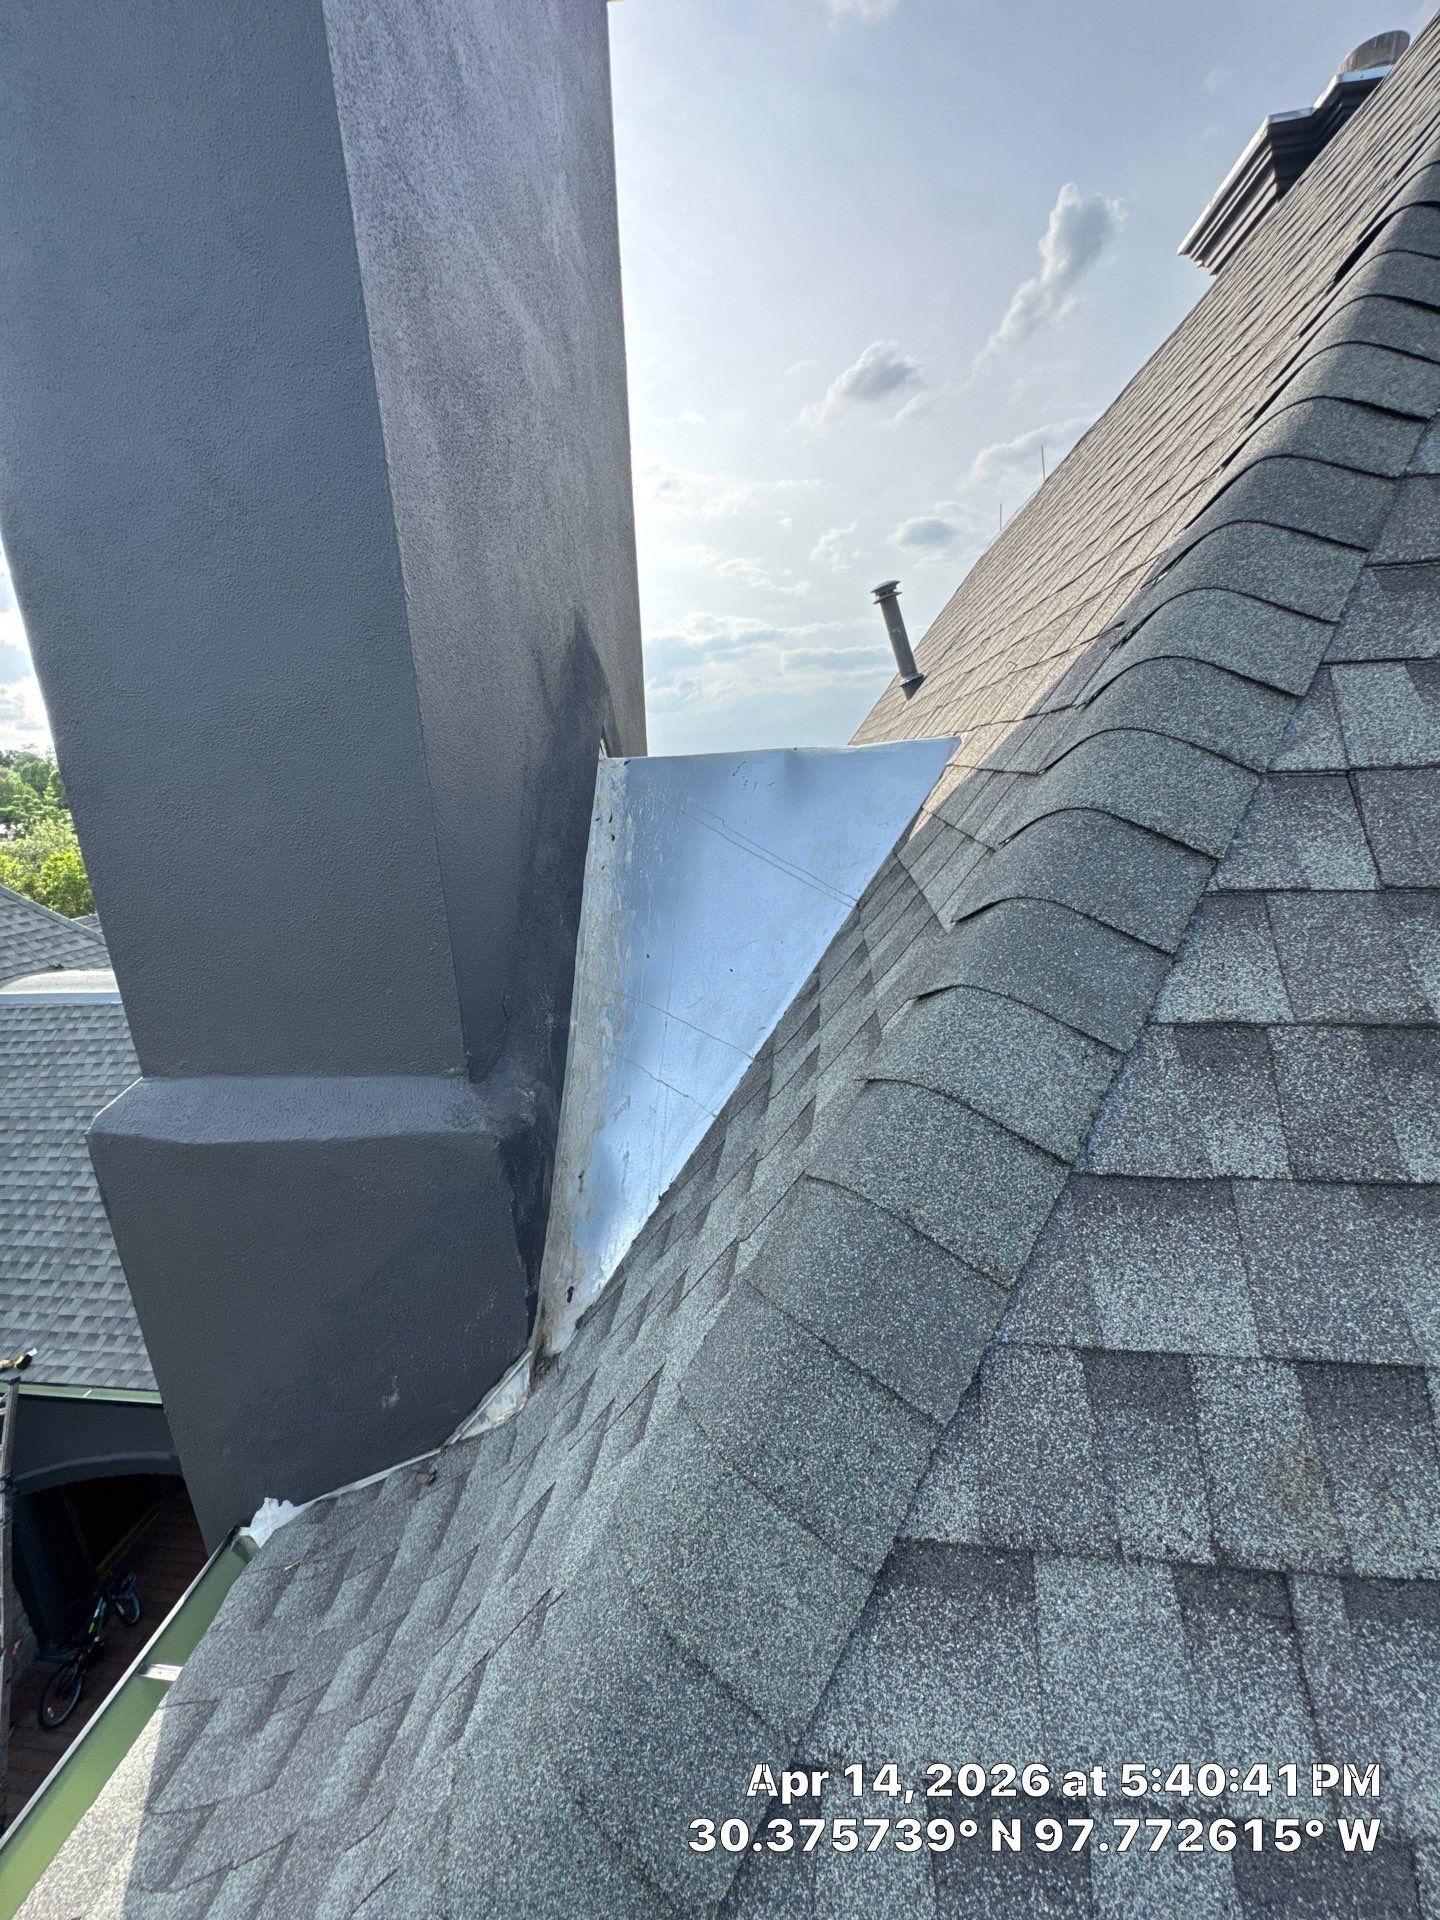
- Improper repair: flashing at junctions such as chimneys, walls, and valleys was resealed rather than properly replaced/weaved in.
- Moisture can continue to be held, even after repairs, if the subsurface decking is compromised or has become soft.
- Common in Austin storms, strong winds can cause rain to blow sideways which can get under shingles.
- Poor ventilation in an attic can cause condensation that resembles a roof leak, but is not.
There are times, however, when you might be caught off-guard. If your sealant is not stopping condensation stains on your ceilings, chances are you do not have a hole. If your attic is not sufficiently ventilated, this can lead to stains on ceilings caused by moisture on the bottom of your roof decking.
In the case of a stain on the ceiling in this single-story home in south Austin, Texas, the location had been patched twice previously. The hole was actually several feet uphill at a poorly tied-in valley. But because of the decking seam the water followed, it came off at the first penetration (nails), and that’s where it hit the ceiling. Documenting where the water really came from made the actual repair obvious. When the source of a leak is unknown, repair is done blindly.
Tip: Speed is NOT as valuable as proper documentation. A recurring leak is NOT due to a careless roofer but due to a poor or incomplete diagnosis. A proper inspection is supposed to reveal the whole story.
What a Diagnostic Inspection Should Document
Water travels a surprising amount on rafters, decking, and on and around nails before staining your ceiling. The entry point is almost never where you see it. If your leak keeps coming back after repairs, it’s not mysterious, somebody didn’t do their job. It should be documented where the leak came from, with physical proof, and that’s not always apparent from the inside.
Another tip: reports that include information such as "sealed around vent" are not very helpful. We get called on a number of second opinions where the work was competently done......just in the wrong place.
Each and every step in that sequence results in an objective record, not an opinion. This sequence should be a given with whom ever you hire.
- Take photos of the interior of the building. Obtain moisture content reading in wetted area. Get comparative readings in adjacent, dry, drywall. Measure stain including distance from two walls and photograph.
- Take photos of the deck, rafters and insulation directly above stain. Note any evidence of water in attic including streaking, compressed/moist insulation, mold, rusty nails. Identify framing member where water streaking begins and make a mark on this member.
- From the location of the attic entry, document all penetrations, valleys, flashing joints and transitions uphill along this path.
- Prior repair assessment. Photograph the old repair itself. Determine what kind of material is being used and the current condition of the material. Determine if the repair itself is going to shed water.
- During the Condition inventory, Note indicators of age of shingles, granule loss, exposed nails, cracked pipe boots, sealant used instead of flashing.
- Water test if needed. Run water in controlled zones, lowest first, with a spotter in the attic. Log the zone and the minute water appeared.
That last step is the one most people skip. And it's the one that separates a diagnosis from a theory.
Tile and concrete tile roofs are common in our area. The leaks are typically at the underlayment and not at the tile. Reports should be made accordingly and not just list cracked tiles. Different roof materials fail differently. The 3-tab asphalt on a 1970s Allandale ranch will fail differently than the standing seam metal on a home in Circle C. Take pictures of seams on low-slope roofs, such as TPO, mod-bit, etc. Be specific with materials. Let people know what’s on the house.
Leaks that are patched with sealant are usually just temporary fixes in Austin. The reason is our crazy weather. Long stretches of sunshine can bake the sealant dry, including on pipe boots. Then, all of a sudden, spring storms can dump multiple inches of rain within an hour. Sealant is going to have a hard time lasting through these crazy weather swings. On top of that, expansive clay soil can cause buildings to shift. This can create openings in areas where the chimney or walls meet the roof. A good inspection should ascertain whether or not the potential path of water matches up with possible structural movement. Your roof report should include this.
Take a photo of skylights, hvac curbs, satelite dish holes, basically anything that sticks up thru the roof. Take photos where two roof planes meet a wall, a surprising number of our repeat leak cases are in this area.
If it doesn’t identify why a previous repair didn’t work, it’s not a proper diagnosis. A reliable inspection includes a series of labelled photos that correlate findings in the attic with any staining on ceilings/walls and identifies the most likely point of entry. A reliable assessment clearly lays out what should be pried open or removed, including specific materials and square footage of materials. Honest inspections identify situations where extensive wear makes a localised repair a challenge that may not hold up well and identify what would change the outcome.
Tip of the day: Taking pictures of the same areas from the same perspective before and after a repair will save a lot of headache for future inspection.
This focus carries over to the practical application: roof repair guidance ... our team provides to local families.
Signs the Original Repair Missed the Root Cause
Leak happens again? Good news! You can figure out what is going on. If your leak returns to the same place you fixed, then the problem is upstream of your fix. Remember, water will run along the rafters and roof decking until it finds an open space where it can drip down to your poor, soggy ceiling. So, the ceiling that is leaking is not where water enters your roof, it’s where it gets out.
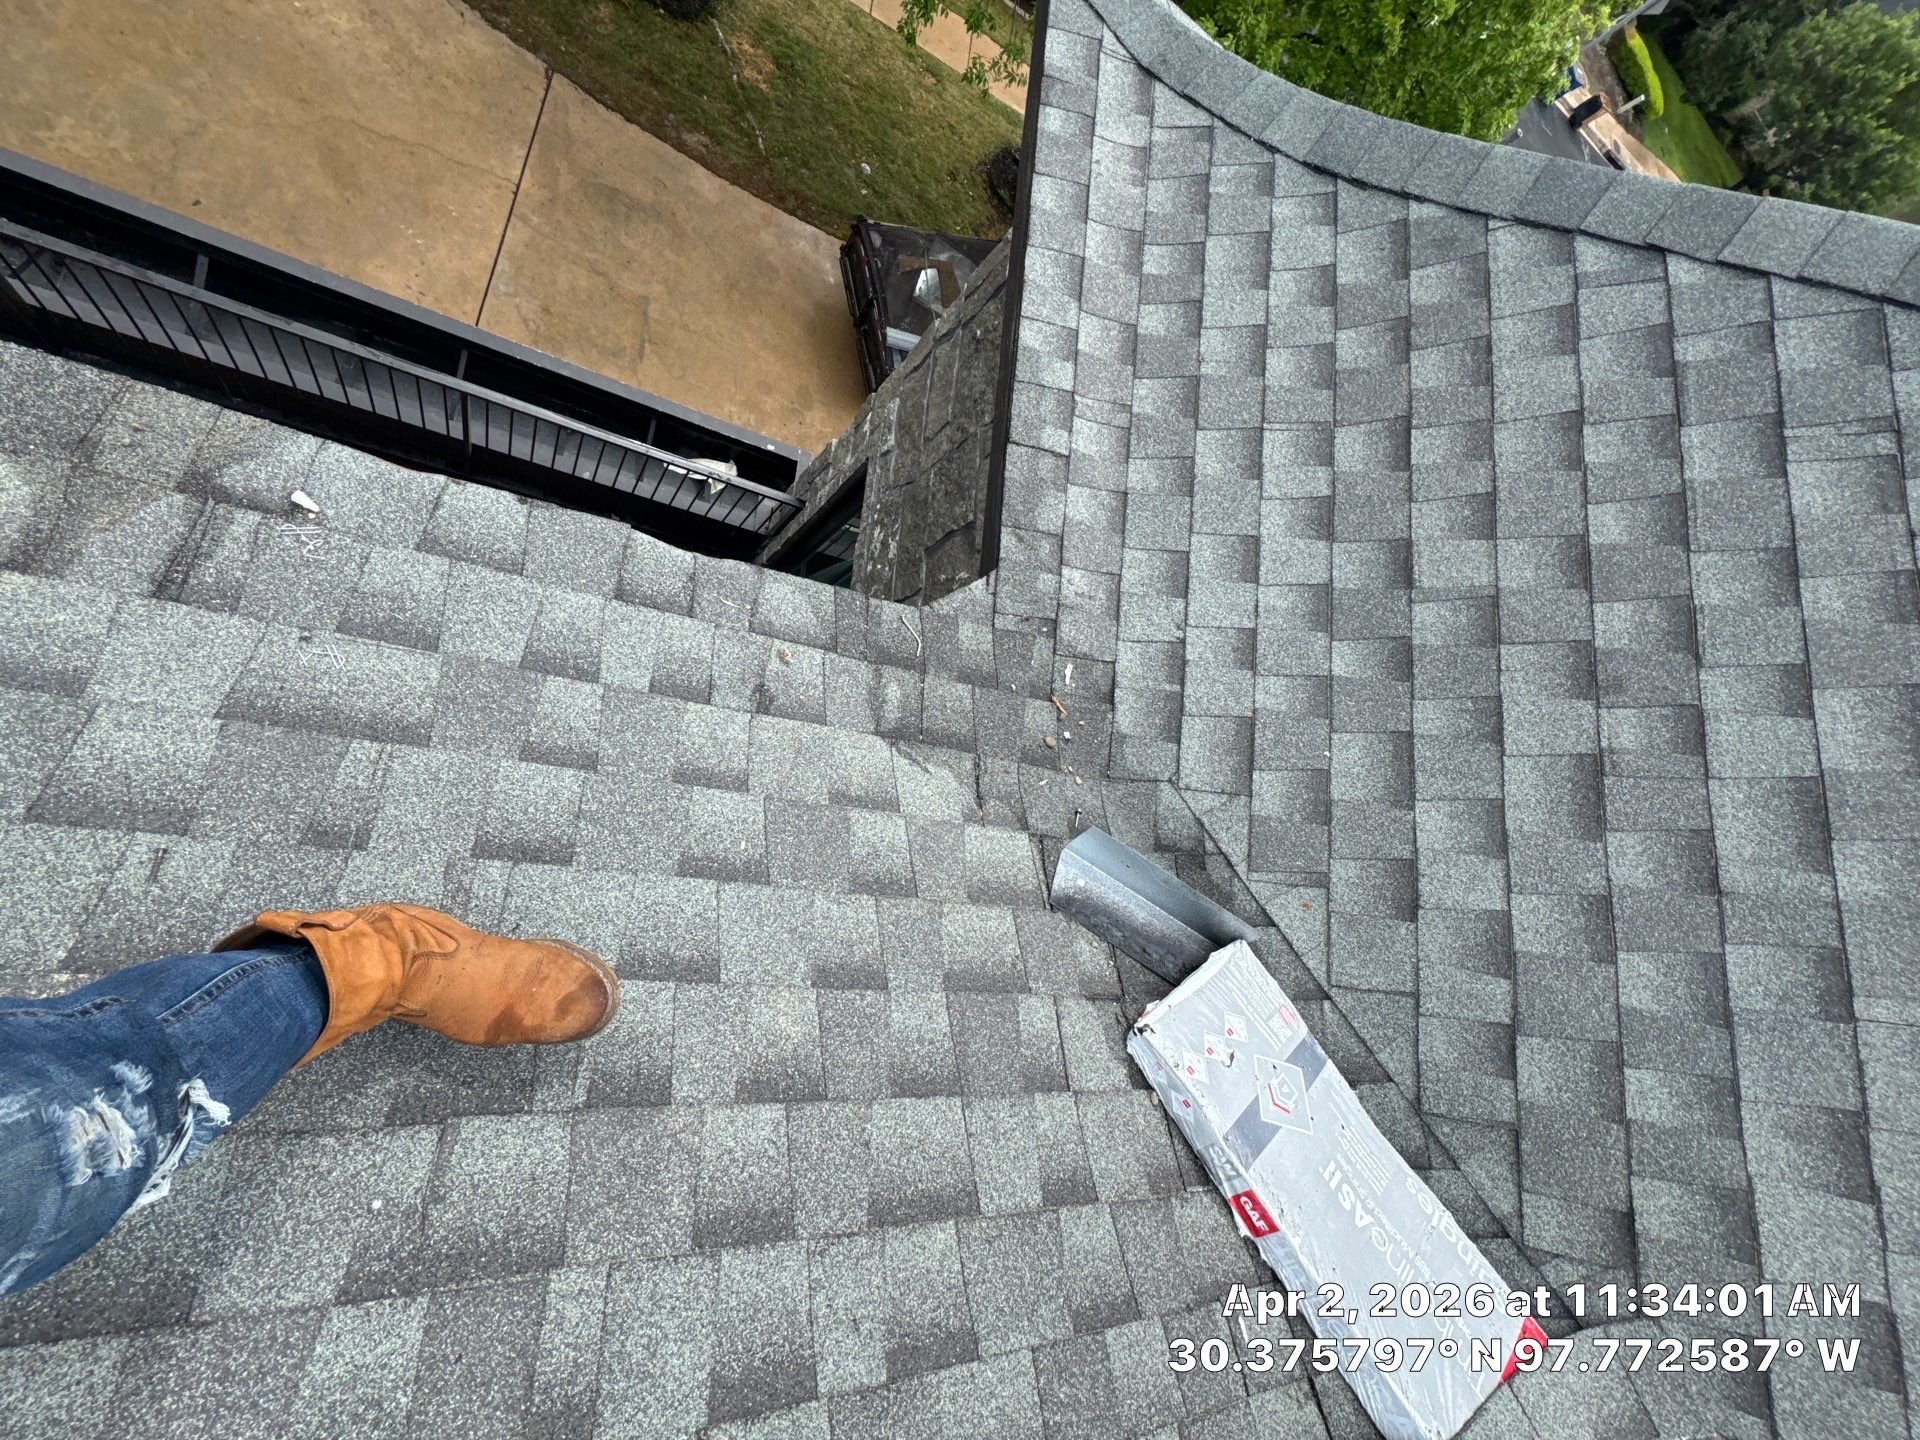
We also see this scenario a lot with additions, especially in older houses in Austin that have several. Somebody will caulk the stain and think they’ve fixed the problem because it doesn’t rain for the next three weeks. But when we get a good soaking, the leak starts dripping again.
There are several tell-tale signs that can point out when an attempted repair didn’t get to the source of a problem.
- If it leaks in prolonged, steady rains even if not necessarily heavy, rather than in brief, downpours, it’s probably not just a hole in a shingle but may be a flashing or wind-driven rain issue.
- If the area of fresh sealant/roof cement isn’t near any fasteners, penetrations, seams, etc., but rather is just in an open field of shingles, this is NOT a fix, it’s a guess.
- If the stain gets wider instead of longer, this means that water is traveling on top of decking before dripping down.
- It is important to remember that water runs downhill. Staining on sheathing in the attic, sometimes several feet uphill from the blemish on the ceiling, provides valuable clues to the path of travel.
- Roofing: The shingles have been replaced; however, the existing step flashing at the wall/chimney has been reused.
- No photos of the original repair either which usually means that a diagnosis wasn't actually performed.
Some steps are way more important than people realize. If you cover up a leak with a patch, but fail to document the condition of the flashing, underlayment or decking, you’ll need to start from scratch later when you cannot rule out problems with those components.
A good number of recurring leaks occur where walls and roofs meet. Examples include second-story walls that meet a lower roof slope and where porch roofs meet siding. Water runs down walls and works its way behind flashing. Simple patches will not correct leaks like these. You will have to dig deeper, sometimes quite deeply, lifting flashing , siding, underlayment and so forth.
Penetrations (pipe boots, HVAC curbs, satellite mounts, dead swamp cooler stands, etc.) continue to be a weak point in roofing. Boots can be tricky to assess. For instance, this boot looked fine from the ground, but upon closer inspection revealed this... Extreme heat in Central Texas can cause boots to dry out and crack well before adjacent shingles fail. This collar had a wide-open crack on the uphill side of the pipe!
The insulation will continue to stay wet and the roof sheathing will weaken over time. In some cases the drip rate remains constant while damage gets worse because of this. It's not uncommon to have a ceiling fail months after moisture was first present.
Once a leak is fixed, the water will start leaking through a different path because of the blockage. This gives the perception that the leak has moved, but in fact, it hasn’t.
Common questions
Frequently asked
Your roof leak likely came back because the first repair fixed the stain, not the actual entry point. Water can travel several feet along decking and rafters before it drips through your ceiling. If the crew only patched where they saw the stain, the real hole is still open. A proper diagnostic inspection traces the full water path before any repair starts, which is the approach we cover on our roof leak repair page.
About the author
Lapeyre Roofing Team
Roofing Specialists